Showing posts with label Home Made. Show all posts

Tuesday, November 4, 2014

Rice Cereal Cookies

My daughter is loving those little rice cereal cookies that you can buy at your local grocery.  We buy ours from Wal-Mart.  However, even buying store brand they are about $2.50 per box and I just hate to spend that much!  So, I looked around for some recipes.  I found one from Wholesome Baby Food that I liked.  I, as always...., changed one thing in the recipe.

My recipe:

You can also use flavored baby cereal if you want. I made them plain, just because this was the first time I was trying the recipe.  Next time I may play around with some flavors.  The original recipe only used the rice cereal,but I thought I would try it with a mix, and it was a hit!  

Let me know if you try them and what you do differently!


Wednesday, October 1, 2014

Frilly Scarf Tutorial

First of all, I have tried to write this blog several times...every time I sit down to type someone needs me! :)  It is wonderful to be a needed wife and Mom though!!

I'm sure you have seen the 'frilly' scarves that became quite popular last year.  I always wanted to make one, but the price per skein of the yarn was more than I was willing to pay... I can be rather cheap sometimes! :)

Not to long ago I found the yarn on clearance!!!  Yay!  So, I purchased several skeins (with intentions to make one for myself and a few for gifts or to sell).  Then, they sat in my craft closet for several months.  Sadly, I had to take a break from crocheting during the second half of my pregnancy.  My fingers would go numb (from slight swelling in my hands and wrists) if I did to much...since grading papers and typing lesson plans was what I was getting paid to do, I had to put those things ahead of the fun stuff!

Now, I am finally back to crocheting and crafting and I am loving it!!!  I certainly missed it!  I finally sat down to make the 'frilly' scarves and oh my goodness!  They were so much fun to make!  It does not take much time to make them at all! I had all of mine made in two afternoon nap-times! (I now measure thins by nap-times!)

I looked at several tutorials (I am a visual/hands on learner) and I still had a couple questions.  So, after I figured it out I  took a few pictures of my own to share with you!

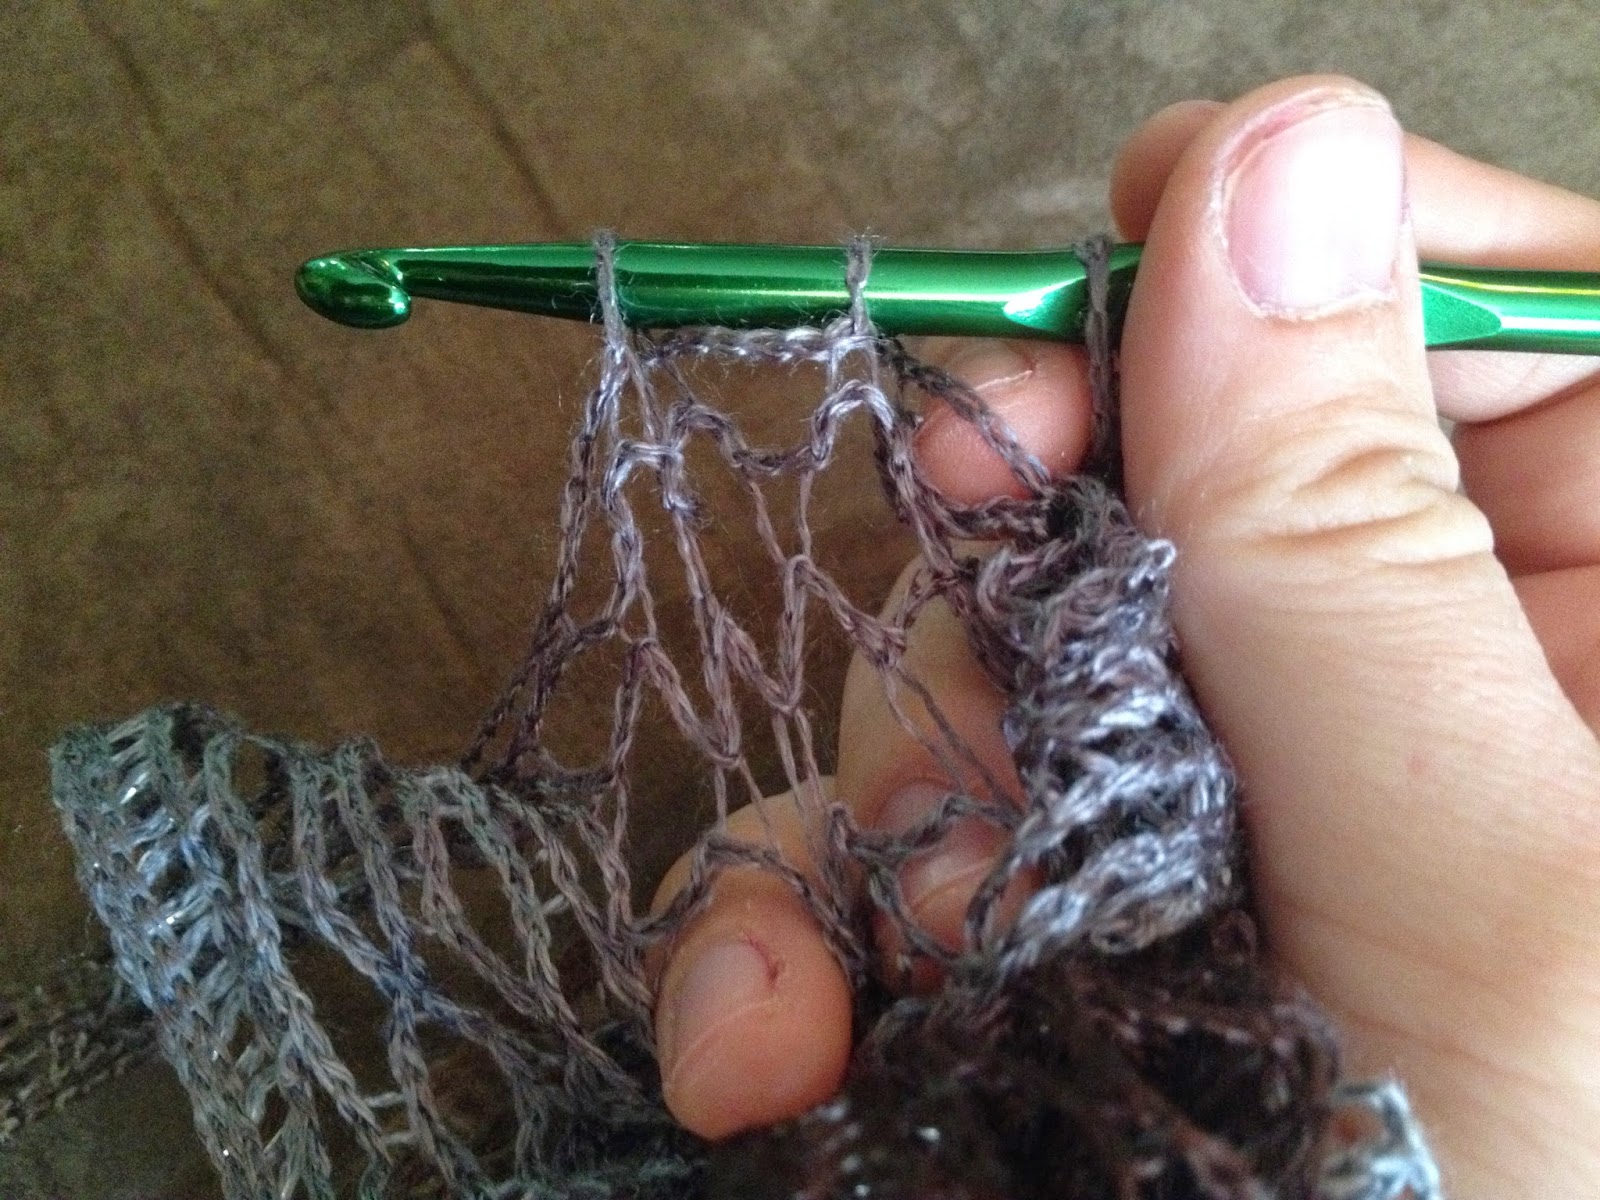
I used a size 'h'crochet hook.  If you spread the first part of the yarn out, you will notice that the two sides are different. You will want to work in the side that is more open...has holes for you to work in.


You are going to run your crochet hook through every other hole/space until you have cast on 10.   In the picture below you can see my crochet hook going through every other space.


After you have cast on 10, you will gather all except the one closest to the hook, and pull the single strand through the group.


Stitch markers were suggested in at least one of the tutorials I looked at, but I chose not to use them, and had no problem.  I believe they were suggested so that the whole scarf would not unravel or you would not lose your place if you had a mishap and dropped the stitches you were currently working on.

Now, I do not claim to be a super knowledgeable crafter/crocheter.  So, if something I have said does not make sense, please comment below or message me and I will do my best to help you out!  

Enjoy your new 'frilly' scarf!!!

Tuesday, February 18, 2014

DIY Laundry Stain Remover

So, my beautiful little distraction tends to create stains on her cute little pink clothes!  And since little girls look much cuter in clean clothes, I had to find a great stain remover!  My Mom told me about a home made stain remover that she had found and tried and how wonderfully it worked!  It got out a stain that had been in a sweater for years!  So, I decided to try it, and I love it!  This is my second batch...

You will need:

Dish Detergent (I used Dawn)
Hydrogen Peroxide
Baking Soda
Small Container (I use a small canning jar)


Mix all ingredients in container and you are done!  How easy was that?  As the mixture sits the baking soda does seem to settle to the bottom.  I use a small spatula to stir the mixture before each use and then to apply it to the stained clothes.  I just keep the stain remover and the spatula right beside the washer!  I hope this works as well for you as it has for me!


Wednesday, February 12, 2014

DIY Liquid Laundry Detergent

So, I had hoped to post this much sooner! However, I currently have a very cute distraction:


So, I am finally getting around to re-posting this with more details and pictures!  I have been using homemade laundry detergent for a couple years now and I absolutely love it!!  This recipe will make 10 gallons (the 5-gallon bucket is double concentrate that you will mix with water as you use it).  I could not even tell you the money we have saved by using this as opposed to purchasing detergent!

You will need:
          - 5 gallon bucket (with lid)
          - 1 bar of soap (Fels Naptha, Ivory, Castille...)
          - Arm & Hammer Super Washing Soda
          - Borax


You will need about 2 cups of water in a medium sauce pan, on medium heat.  
Grate your bar of soap into the saucepan of water.


Stir until the soap is completely melted.


I usually place my 5 gallon bucket in the bathtub.  I also measure my Washing Powder and Borax ahead of time and place them in a small container.  After the soap is dissolved in the water, pour the soap mixture into your 5 gallon bucket. Add your Washing Powder and Borax.  Stir until the dry mixture is completely dissolved.


Fill the bucket with water and let sit overnight.


It's consistency will turn to a gelatin like consistency, with some liquid around the edges.  When you are ready to use it, simply fill a laundry detergent container half way with the homemade mixture and then finish filling the container with water. Shake well and use just like you would your regular detergent!

**If you want, you can add some essential oils for a nice scent**

I hope that this has been helpful!!! Please feel free to comment below!


Monday, November 18, 2013

Taco Bites

Sunday night was a devotion followed by a fellowship meal at our church.  My sweetheart wanted to take something including deer meat (since he recently got a beautiful 9-pointer with his bow).  I had seen Taco Bites on Pinterest, but I had not (and still haven't) taken the time to read the recipe...So, I made my own as I went.  Apparently they were good because my dish came home empty!

I started my fresh deer meat.  I love to begin with some olive oil and fresh garlic before I add the ground meat.  After the meat was completely cooked (browned) I added my home-made taco seasoning!  After I add the seasoning I let the meat continue to cook on low for a few minutes.  While the meat is cooking I prepared some refried beans. In the interest of time, I opened a can and added 2T water, and heated them for about 1 minute.

Lightly spray your pans.  Line with tortilla shell.  I have made these myself...and oh my - so delicious! However, as I mentioned earlier - in the interest of time, I chose to use store bought.  I purchased the small size and cut them into quarters.


 Next, I added a small spoonful of refried beans.


On top of the refried beans I added a small spoon of the seasoned meat, and sprinkled with a mixture of mozzarella and cheddar cheeses.  


I then repeated the first three steps.  This makes two layers of tortilla shell, beans, meat, and cheese.

Bake at 325 for about 15-20 minutes and....


They smelled so delicious!  Everyone seemed to enjoy them.  I would serve them with a bowl of salsa and a bowl of sour cream.  That way people can customize them for their own preferences!  

Enjoy!

Tuesday, March 19, 2013

Spinach and PepperJack stuffed Chicken

So, we all know that I absolutely love to cook!  Sometimes I wonder why I chose to get a degree in education?  Then, I remember how much I love my little angels in my classroom also!  So, I teach for a job and I cook for fun! :)  I have been working during the past year to grow my small cake/baking business and I have had so much fun with cake decorating!  I will try to post some pics of the cakes later.  For tonight, we'll talk about what I just ate for dinner!  Ohhhh my!  It was delicious!  This is another recipe that has been put into the 'rotation' by my sweet Mountain Man.  I found this recipe via Pinterest, and the actual recipe can be found here. 

The first time I made this...it looked horrendous!  However, it did taste very good!  So, I decided to make it again.  Of course, it seems nothing I make ever goes exactly as planned!  I thought that I had pepperjack cheese in the fridge - well, not so much!  So, I combined some cheddar and mozzarella with some red pepper flakes to use instead of the pepperjack cheese.  I also chose to cook my own spinach because it was cheaper than buying the frozen. 

So, the recipe with my modifications is:

  • 2 boneless, skinless chicken breasts
  • 4 oz pepper jack cheese, shredded (you can use up to 6 oz)
    • (Cheddar Cheese, Mozzarella Cheese, Red Pepper Flakes)
  • 1c cooked and drained spinach (I did not use exact measures here)
  •  olive oil
  • 2 tbsp Cajun seasoning
  • 1 tbsp breadcrumbs (I use my own - see below)
  • Salt
  • Pepper
  • Lots of toothpicks


Preheat oven to 350 degrees.

Flatten the chicken

In a medium bowl, combine the pepper jack cheese, spinach, salt and pepper.

Combine the Cajun seasoning and breadcrumbs together in a small bowl.

Spoon about 1/4 c of the spinach mixture onto each chicken breast. Roll each chicken breast tightly and fasten the seams with several toothpicks. This part requires a tiny bit of skill and I typically use about 8 toothpicks in each roll to ensure none of the filling seeps out. Be sure to count how many total toothpicks were used!

Brush each chicken breast with the olive oil. Sprinkle the Cajun seasoning mixture evenly over all. Sprinkle any remaining spinach and cheese on top of chicken (optional).

Place the chicken seam-side up onto a tin foil-lined baking sheet (for easy cleanup). Bake for 35 to 40 minutes, or until chicken is cooked through.

Remove the toothpicks before serving. Count to make sure you have removed every last toothpick. Serve whole or slice into medallions.


I left her directs the same because I really didn't do any of that differently.  I noted that I did not use exact measures on the spinach - I have a difficult knowing how much to put into the pot for it to cook down the exact amount, so I fill up my littlest pot and just hope for the best - so far this has worked wonderfully!  As far as bread crumbs - I learned from my wonderful Mother that there was no sense buying something I already had!  Whenever I make biscuits or bread there usually ends up one lonely piece or one lonely biscuit.  So, I crumble up that leftover bread.  I keep a Ziploc bag in my freezer and as I have leftover bread I add it to the bag.  I also have a bag for the little cheese cracker crumbs!  They are great for breading chicken fingers - but that is a different blog! 

Here is what my chicken looked like the 2nd time:

 
And the inside...


I promise you this was delicious!  And, my Mom had the wonderful idea of substituting broccoli for the spinach...may have to try that!!!
 
Let me know how this works for you!


Saturday, January 19, 2013

Chicken Caesar Pizza!

I have another healthy recipe favorite!!  This is one I learned when I was selling Pampered Chef.  I actually used it for a show and everyone loved it!  I have also made it several times at home and it is a big hit!  Not only is it healthy but it is also quite easy!

You will need:
Pizza Crust                               Caesar Salad Dressing
Romaine Lettuce                      Grilled Chicken
Shredded Cheese                      Bacon (chopped/diced)


I actually use a pizza crust mix to make this.  I added some shredded mozzarella and some oregano to the mix. You can use any type pizza crust you would like and there are may variations (wheat, pita, etc...)
 
The first thing to do is to rinse the lettuce and let it drain. (I also added a little Kale) Shred it by hand, and toss it in a bowl with just enough Caesar dressing to lightly coat the leaves.   I used a homemade Caesar dressing that I made with my Pampered Chef Measure, Mix, and Pour.
 
Bake the crust until it is a nice golden brown.  After it is baked, brush a light layer of Caesar dressing over the top.
 
 
While the crust is baking you can cook your chicken. I took a whole chicken breast and chopped it up and cooked it in a skilled with some olive oil, garlic, and real bacon bits (not the fake kind!).


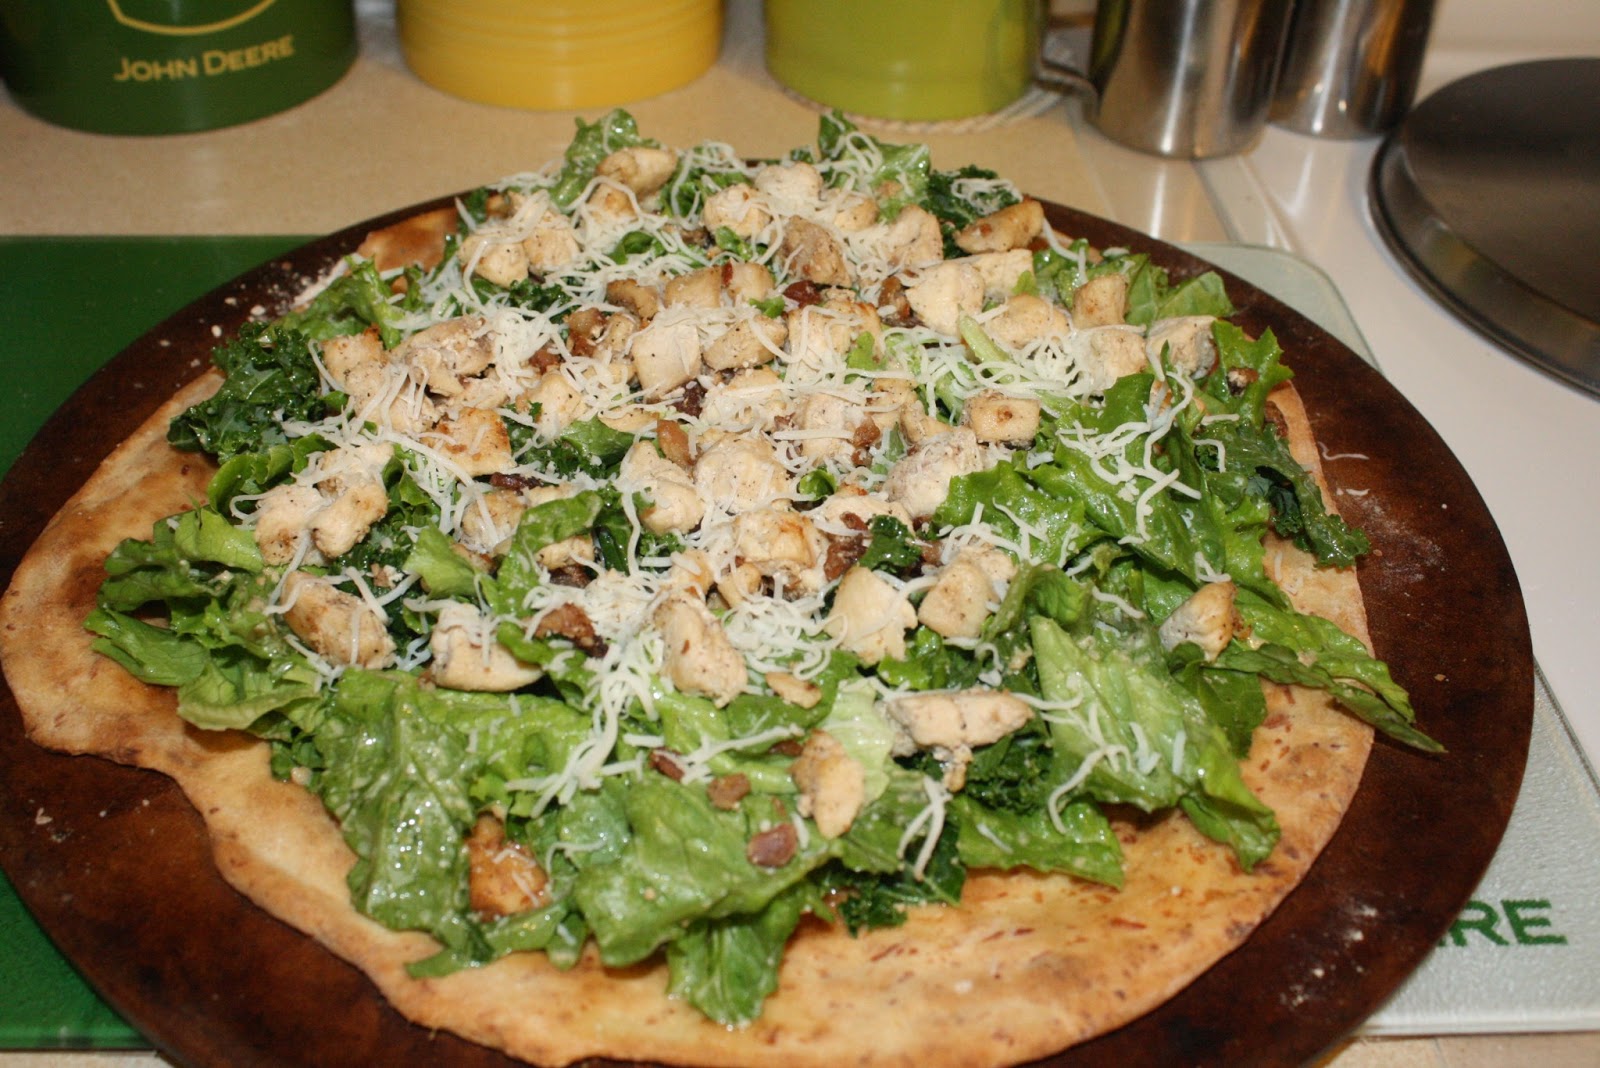
Layer the lettuce, chicken and shredded Cheese on the pizza crust and enjoy!!


If your family likes tomatoes they would make a great addition to this pizza, as well as any other salad topping you enjoy!
 
Let me know if you have any suggestions!


Friday, October 12, 2012

Home Made Body Wash...

There are many recipes for home made body wash. Some claim to be good for eczema, moisturizing, cheap, etc...   I took one of the recipes that I found and, as I often do, I modified it! :)  I am pretty sure that if I made it again, I will still make at least one change...

You will need:

1 bar of soap
several containers
Glycerin (can be found at places like Hobby Lobby)
1/2 gallon water
scent/color if desired
large pot

 
Start by putting your water in the pot and turning the burner to medium heat.

 
I chose to use Ivory soap because that was what I had on hand.  I think that next time I will try Dove or a more moisturizing soap.  The Ivory turned out fine, but I would be interested in seeing what the difference is.  You need to grate your soap so that it will melt into the water more easily.  I cut the soap into small pieces first.
 

When making my home made laundry detergent I learned that it was easiest to use my Pampered Chef handheld grater (like the ones at Olive Garden)
 
 
After the soap is grated into the pot, stir until all the soap is melted.  Then add 2 Tbs Glycerin (next time I would use only 1 Tbs I believe - it made this batch a little gooey...not as smooth as I would have liked) and any scent or color you would like to use.

 
Pour/ladle the soap mixture into your containers and let cool.

 
After the soap has cooled the color will darken.  It will seem as if it is a solid, just shake the container and it will loosen up.  I used mine this morning and it worked just fine! 
 
Let me know of you have any variations, or if you try it!  I would love to hear how it worked for you!


Friday, September 21, 2012

Deer Calzones...

First of all, these can be made with any type meat you choose...but at our house...deer is preferred!

I start with browned (scrambled) deer meat.  I add pizza sauce and seasonings to it and let it simmer.  Then I use a pizza crust mix (the kind you just add hot water too) and mix it up as the directions say.    I usually get about three calzones out of one pizza crust.  After the crust is ready, I separate it into three sections.  Take one section and roll it out...

 
I brush the inside of the calzone with a little bit of EVOO, then spoon in the deer meat mixture.  I also sprinkle the deer meat with cheese and top with Turkey Pepperoni.

 
Fold over the top of the calzone (be careful not to poke a hole in the crust like I did on one of the ones below!), and I seal it with a fork.  If you are overly picky about how it looks you can take a knife and trim off the ragged edges after you have sealed it.


Then I make a mixture of EVOO, Parmesan cheese, and oregano.  The consistency needs to be a little more runny than a paste.

 
Lightly brush the mixture over the tops of the calzones.


Place in the oven and bake at 375 for about 15-20 minutes, or until crust is a golden brown.
 
 
ENJOY!!
 

Tuesday, July 31, 2012

Pinterest Project of the Day - Day 16

Today I decided to do some baking!  It has been a few weeks since I made and decorated a cake and I was having the family over tonight, so it just felt right!  I looked through the cake ideas I had pinned and decided to do a golf theme cake.  Tonight I made it just as the picture showed it....white sides, grass on top, golf ball in the hole.  It turned out fine, but it just looked rather plain...so...I now have big plans for a redo with some special features!! :)  Now, I just need an event that I am supposed to bring a dessert to... :) 

Here is a picture of what I did tonight...I couldn't find a real golf ball and had to scramble to make something work (since I ate the cake that I cut out to make the hole!).


Saturday, July 21, 2012

Pinterest Project of the Day - Day 10

I have been in a crochet mood here lately!  After making the infinity scarf, and the 'One Hour Scarf' I decided to try one of my own.  I don't generally sit down for one hour and just crochet...if I sit down for that long it is because I am in church, or watching a movie with my husband.  So, I decided to make the 'One Movie Scarf'.  A scarf I can sit down and make while watching a movie.  It took me a couple tries to get it turn out how I wanted...here is what I came up with!


I used yellow and gray Red Heart yarn (about a 1/2 skein of each color), and crochet hook size 'P'.  Holding both strands together chain approximately 100 (or desired length), turn, double crochet in the third chain from the hood, double crochet across.  Turn and repeat until scarf is desired width.  I did 5 rows.  Enjoy!

Friday, July 20, 2012

Pinterest Project of the Day - Day 9

I found a spiral/circular crochet potholder on Pinterest a few months ago.  So, when I decided to make one to go under a centerpiece on my table, I was very disappointed to find it did not lead to a pattern.  Although, there was no pattern, I was able to look at the pictures and make my own patter.  I did not make my pattern exactly like the pictures showed, but I made it my way! :)  Below I have listed pictures and my pattern.  The one I found was made with cotton yarn, which would be great!  But, for what I needed, purely decorative, I chose to use regular Red Heart yarn.  I also used crochet hook H.


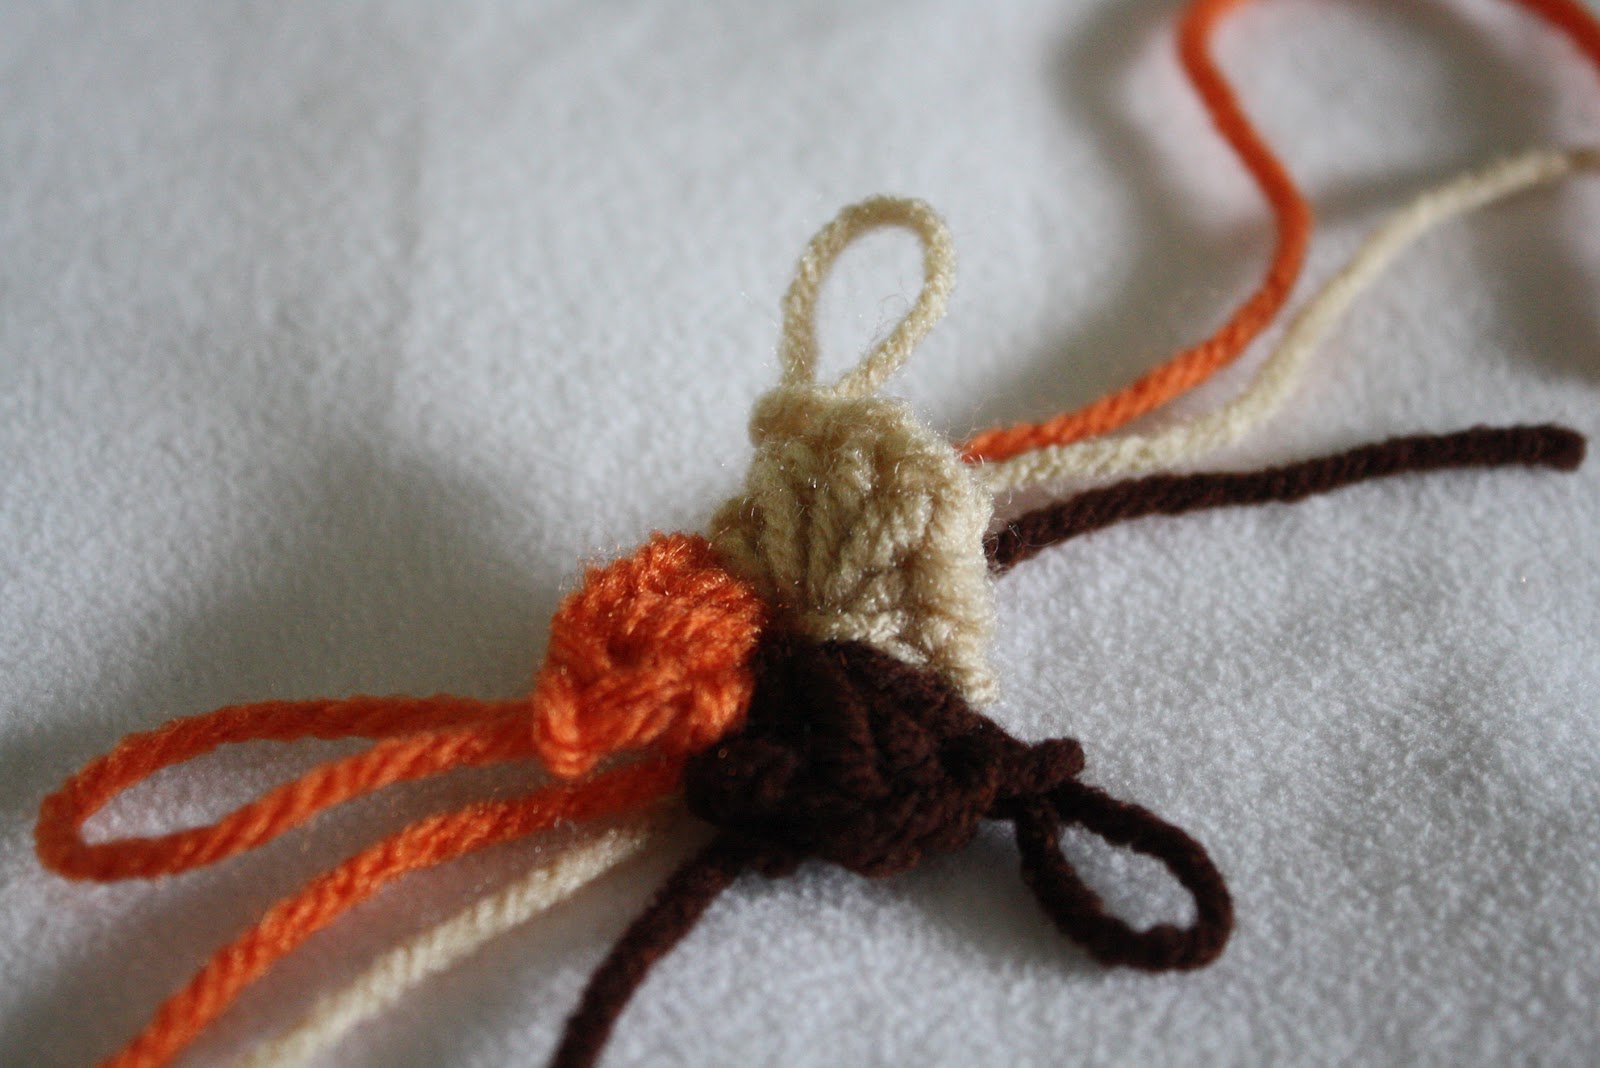
I started by making a 'Magic Ring' (you can find directions on the internet).  I then did one single crochet (sc), and three half double crochet (hdc) in each color. 

 Round 2:
in first hdc - hdc
 in next hdc - 2 hdc
in next hdc - hdc, double crochet (dc)
in next hdc - 2 dc
(in each color)


 Round 3:
*2 dc, dc* in each stitch across (12 total stitches made)
in each color


Round 4:
*2dc, dc, dc*, across (16 stitches)
in each color

Round 5:
*2dc, dc, dc, dc, dc* across (18 stitches)
in each color


Round 6:
*2dc, dc, dc, dc, dc, dc, dc, dc, dc* across (20 stitches)
in each color


Round 7:
dc, hdc, in first stitch, hdc in next 10 stitches
hdc, sc in next stitch, sc in next 10 stitches
in each color

Round 8:
Use color of choice and single crochet around the remaining edges until your color meets itself, crochet small hook (if desired) and tie off.


I am obviously not a pattern writer, so if this is confusing please feel free to comment with any questions!  Enjoy!

Monday, July 16, 2012

Pinterest Project of the Day - Day 7

I didn't actually do this project today.  I am actually away from home and am in Memphis at the National Association of Free Will Baptist.  Since it is quite difficult to travel with all my favorite crafting supplies, I thought I would post about a project I have already completed...and actually I have done this project many times. It makes a great gift and every one who has received this has been very grateful! :)  There are many different patterns you can use, either crochet or knit and these are the most useful things you will ever make!!  I have pinned many patterns on my crochet/knit board on Pinterest - the one below I actually found in a book I had bought years ago...the main thing is that you use cotton yarn!   I have found that it is cheapest at Wal-Mart unless you use a 40% coupon at one of the crafting stores like Hobby Lobby or JoAnn!

I am actually talking with a local shop owner about putting some of these in her store on consignment, as well as perhaps some scarves or other hand made items....so, all prayers are appreciated! :)

Also, if you don't want to make your own...check out my shot at http://www.etsy.com/shop/SimplySweetbyCori?ref=si_shop!!  You can even request custom colors.  Enter the coupon code 'Project10' for a 10% discount!


Wednesday, July 11, 2012

Pinterest Project of the Day - Day 3

Hi, my name is Cori, and I am addicted to dessert... 

My Grandfather is talked about for asking what was for dessert as soon as the prayer for the meal was over!  I think I am much like him in that way.  I am always ready for dessert.  As a child, I would tell my mother that I was full of regular food, but that I had a separate space for dessert!  Being in and out of town or visiting with family during the summer means that I don't do as much cooking.  The only desserts I have made in the past few weeks have been to take places.  Tonight after dinner, I wanted some dessert, but I did not want to make a big dessert.  I recalled seeing the Mug Cake on Pinterest.  So, as usual, I compared a few different recipes that I found, and modified them to make my own version.  It was delicious!  This project was definitely a success.  I may still tweak the recipe some...next time I plan to try using one egg in two mug cakes (I made two tonight,because if you make dessert, you should have enough to share with your loving husband!).  I will let you know how it goes in the future.  Below is the recipe I compiled and modified to make my own.  If you have any recommendations, please comment! I would love to hear your feedback!


Mug Cake

4 T All Purpose Flour
4 T Sugar
1/2 tsp Baking Powder
1 Egg
1 T Coco Powder
1 1/2 T Hershey's Syrup
1 T Milk
1/2 tsp Vanilla
3 1/2 T oil
Chocolate Chips

Mix all ingredients in large coffee mug.  Cook in microwave for 1 to 1 1/2 minutes.  Let cool - just enough that it won't burn you.  ENJOY!!!

Monday, July 9, 2012

Pinterest Project of the Day - Day 2

I am all about doing things that can save money!  I also love to do things 'home-made'.  I don't go as far as some do, but I do try to do as much as I can to make my own products and do it the cheap way! I also have always been a huge fan of dishwashers!!  As I would help my Mom with dishes at home I always told her that when I got my own house I only wanted 'dishwasher safe' items.  While, not every item in my kitchen now is dishwasher safe, the majority of my items are! Because I love to cook, and try to make everything I can from scratch, I generally mess up quite a few dishes when I go to cook dinner. Therefore, I run my dishwasher every couple days at least (and I'm sure that will increase as we have children!).  Dishwasher tabs are quite expensive and that expense was just not fitting into my weekly Wal-Mart grocery and household needs budget.  So, a friend of mine had tried making dishwasher detergent from a recipe found on Pinterest and they truly liked it!  Well, I got on Pinterest and found quite a few recipes for dishwasher detergent.  Some made huge batches, some made small batches, some required lemon Kool-Aid (which would stain your dishwasher after a few uses).  After ready many many recipes, I finally found one I wanted to try!  So, I mixed up a batch and of course, just happened to have a dishwasher full of dirty dishes to try it on!  I have to say, I like it!!    Below is a picture of my detergent and the recipe I used to make it!  I also used vinegar as the rinsing agent (in that little spot in the dishwasher door!).  Good Luck and enjoy!!


2 cups of Borax
2 cups of Baking Soda
 4 tablespoons of citric acid--can be found near canning items
White Vinegar

Mix everything together by either dumping into a big bowl and stirring it really well or dumping it into a container with a lid and shaking it up. You can keep it in your lidded container or re-use your old detergent box, or a jar.

I use about 1 1/2 tablespoons per load. (3/4 tablespoon in the open cup and 3/4 in the closed locking cup)  I have heard that if you have hard water, you can adjust the amount of Borax, or add salt to the detergent mixture

Monday, March 5, 2012

Update on the Dryer Sheets...

WOW!  So, I have learned that my plan for making my own dryer sheets did not work out quite as well as I had hoped.....they got moldy.  Very sad day!  So, Plan B!

Make home made fabric softener, as mentioned in previous post.  Put in a spray bottle (you can buy these for $1  or less at Wal-Mart or the Dollar Store).  Keep dry rags in a container.  When you are ready to put a load of laundry in the dryer, gently shake the spray bottle of fabric softener and spritz the rag before tossing in the dryer!

Hope this helps!