Tuesday, July 31, 2012

Pinterest Project of the Day - Day 16

Today I decided to do some baking!  It has been a few weeks since I made and decorated a cake and I was having the family over tonight, so it just felt right!  I looked through the cake ideas I had pinned and decided to do a golf theme cake.  Tonight I made it just as the picture showed it....white sides, grass on top, golf ball in the hole.  It turned out fine, but it just looked rather plain...so...I now have big plans for a redo with some special features!! :)  Now, I just need an event that I am supposed to bring a dessert to... :) 

Here is a picture of what I did tonight...I couldn't find a real golf ball and had to scramble to make something work (since I ate the cake that I cut out to make the hole!).


Saturday, July 28, 2012

Pinterest Project of the Day - Day 15

Amidst my time with family here in North Carolina I found time to work on a project for today!!  It has been a full day!  I did the first part of the project this morning, then we went to visit some family, ate lunch at Hardees, and spent some time in the pool!!  So, this afternoon I was able to finish my project for the most part.  I did have to make a stop at Wal-Mart to pick up the final detail!  I recently found a simple crochet pattern for a coffee cup cozy on Pinterest.  So, I figured that would be rather simple to make with the partial skein of yarn I brought with me!  The pattern recommends using cotton yarn, but I had acrylic and it worked just fine!!


If you are interested in making one of these, you can find the pattern at Ravelry for free!  Or, if you would like to purchase one, please check out my Etsy shop!!  As with my other products, this can be made in custom colors, just message me for details!

Pinterest Project of the Day - Day 14

Yesterday I spent the day in a minivan with my sister-n-law and her three children...so...didn't really do much of a project! :)  However, any day spent with family is wonderful!!  So, I thought I would show ya'll an old project that I did and had on back-up for such situations!  I have already talked about my closet and the pegboard to hang my purses (thanks Dad and Stephen).  I had been trouble storing my 'cute' winter boots and saw the neatest idea on Pinterest.   You take those foam pool noodles and cut them to size and stick them down in your boots.  So, I went to get some pool noodles...and could not find them!!!  But finally, after girls night with my best friend we were seeking shelter from a storm in Kroger and there were my pool noodles...ON SALE!!  Woohoo!!  I bought three, but only used two, and here is the finished product!  I am so pleased with this project, and it was SO easy!!


Put the pool noodle  in your boot
Mark the desired height with a marker
Cut with regular scissors

Thursday, July 26, 2012

Pinterest Project of the Day - Day 13

Yesterday I had a friend ask about a project that I had pinned and had not yet completed.  So, today I worked on that project.  It took me a little while to get it the way I wanted it.  The project is a crochet flower.  The pattern is very simple, but because of that simplicity, lacking details.  I am a person who likes to know the details....so, it took a few tries, but I finally came up with a crochet flower that I think is acceptable!  The original pattern shows a cute button as the center of the flower, however I don't have any buttons that will work, so I suppose I will just have to go Hobby Lobby and get some!! My friend wants to use this to make a hair clip for her daughter - which I think will be adorable!


If you are interested in the patter it can be found on my Crochet-Knit Board on Pinterest.  Or, if you would like to purchase one please check out my Etsy Shop for more information - as with the other projects this can be made in custom colors, just message me and let me know!


********************************UPDATE*************************************

Here are some of the haribows that I have made using this flower!!  If you are interested in purchasing please check out my Etsy store, or message me - these can be made in custom colors!


Wednesday, July 25, 2012

Pinterest Project of the Day - Day 12

First of all, there are SO many great projects to do, and it can be so difficult to pick one!  For that reason I have actually worked on a couple today.  So far, I have one completely finished...and I love it!! Today I decided to make a cover for my Swiffer Sweeper Mop .  It turned out absolutely great!! I actually found a couple different types of covers to make and I chose to make the one I thought seemed most useful!  This one is double sided, you have the dusting side, and then the other side is better for using as a damp mop.  My favorite thing about this, is that it is reusable!!  The pattern can be found by checking out my page in Pinterest http://pinterest.com/luv2teach216/, or at http://www.ravelry.com/patterns/library/reversible-swiffer-sock.


This side is for dusting.  The entire cover is made with acrylic yarn, which is great for dusting.


Turn it over, and you have a great side for using as a damp mop!

Now there is no more need to buy those Swiffer covers, you can simply crochet or purchase ( http://www.etsy.com/shop/SimplySweetbyCori?ref=si_shop) one of these!  After each use simply shake off the dust into a trashcan (or outside) and toss in the washer.  Wash and dry with your towels and you are good to go!  You might even crochet or purchase a 2nd one so you always have a clean one on hand! 

Tuesday, July 24, 2012

Pinterest Project of the Day - Day 11

I was rather disappointed with my project today.  Thankfully, I had a great day otherwise!!  As I am typing this I have my niece and nephew in the floor playing at my house, because they are having a 'sleepover' with Uncle Steve, Aunt Cori, and Cooper.  However, my project could have proved quite fun, but it just didn't work like I had hoped.  Today's project was to make bathtub crayons.  This is the second time I have tried to do this.  Finding the items to make it with were quite simple...they were at Hobby Lobby and after using a 40% coupon it was also rather inexpensive!  The first time I used basic food coloring (what I keep on hand for my cake decorating, paste and gel color).  The crayons turned out, but would not write on the shower wall...which was what I was wanting them to do.  So, I did a little looking and found some liquid color that said it was very concentrated...so today I tried that...they still don't write on the shower wall.  They do make colors in the water, but I wanted to be able to leave cute/sweet notes on the shower wall...which Stephen may or may not have noticed! :)  Below are the items I used to make the soap, and the finished product.


I melted one glycerin cube in the microwave (1 minute), then added food color, poured into the molds, and let it harden.


The crayons turned out beautifully, and were so simple to make, I love them, but they don't do exactly what I wanted them to... So, if anyone has any suggestions on how to make these not only fun for kids, but also fun for me - so I can write on the shower wall - let me know!! :)

Saturday, July 21, 2012

Pinterest Project of the Day - Day 10

I have been in a crochet mood here lately!  After making the infinity scarf, and the 'One Hour Scarf' I decided to try one of my own.  I don't generally sit down for one hour and just crochet...if I sit down for that long it is because I am in church, or watching a movie with my husband.  So, I decided to make the 'One Movie Scarf'.  A scarf I can sit down and make while watching a movie.  It took me a couple tries to get it turn out how I wanted...here is what I came up with!


I used yellow and gray Red Heart yarn (about a 1/2 skein of each color), and crochet hook size 'P'.  Holding both strands together chain approximately 100 (or desired length), turn, double crochet in the third chain from the hood, double crochet across.  Turn and repeat until scarf is desired width.  I did 5 rows.  Enjoy!

Friday, July 20, 2012

Pinterest Project of the Day - Day 9

I found a spiral/circular crochet potholder on Pinterest a few months ago.  So, when I decided to make one to go under a centerpiece on my table, I was very disappointed to find it did not lead to a pattern.  Although, there was no pattern, I was able to look at the pictures and make my own patter.  I did not make my pattern exactly like the pictures showed, but I made it my way! :)  Below I have listed pictures and my pattern.  The one I found was made with cotton yarn, which would be great!  But, for what I needed, purely decorative, I chose to use regular Red Heart yarn.  I also used crochet hook H.


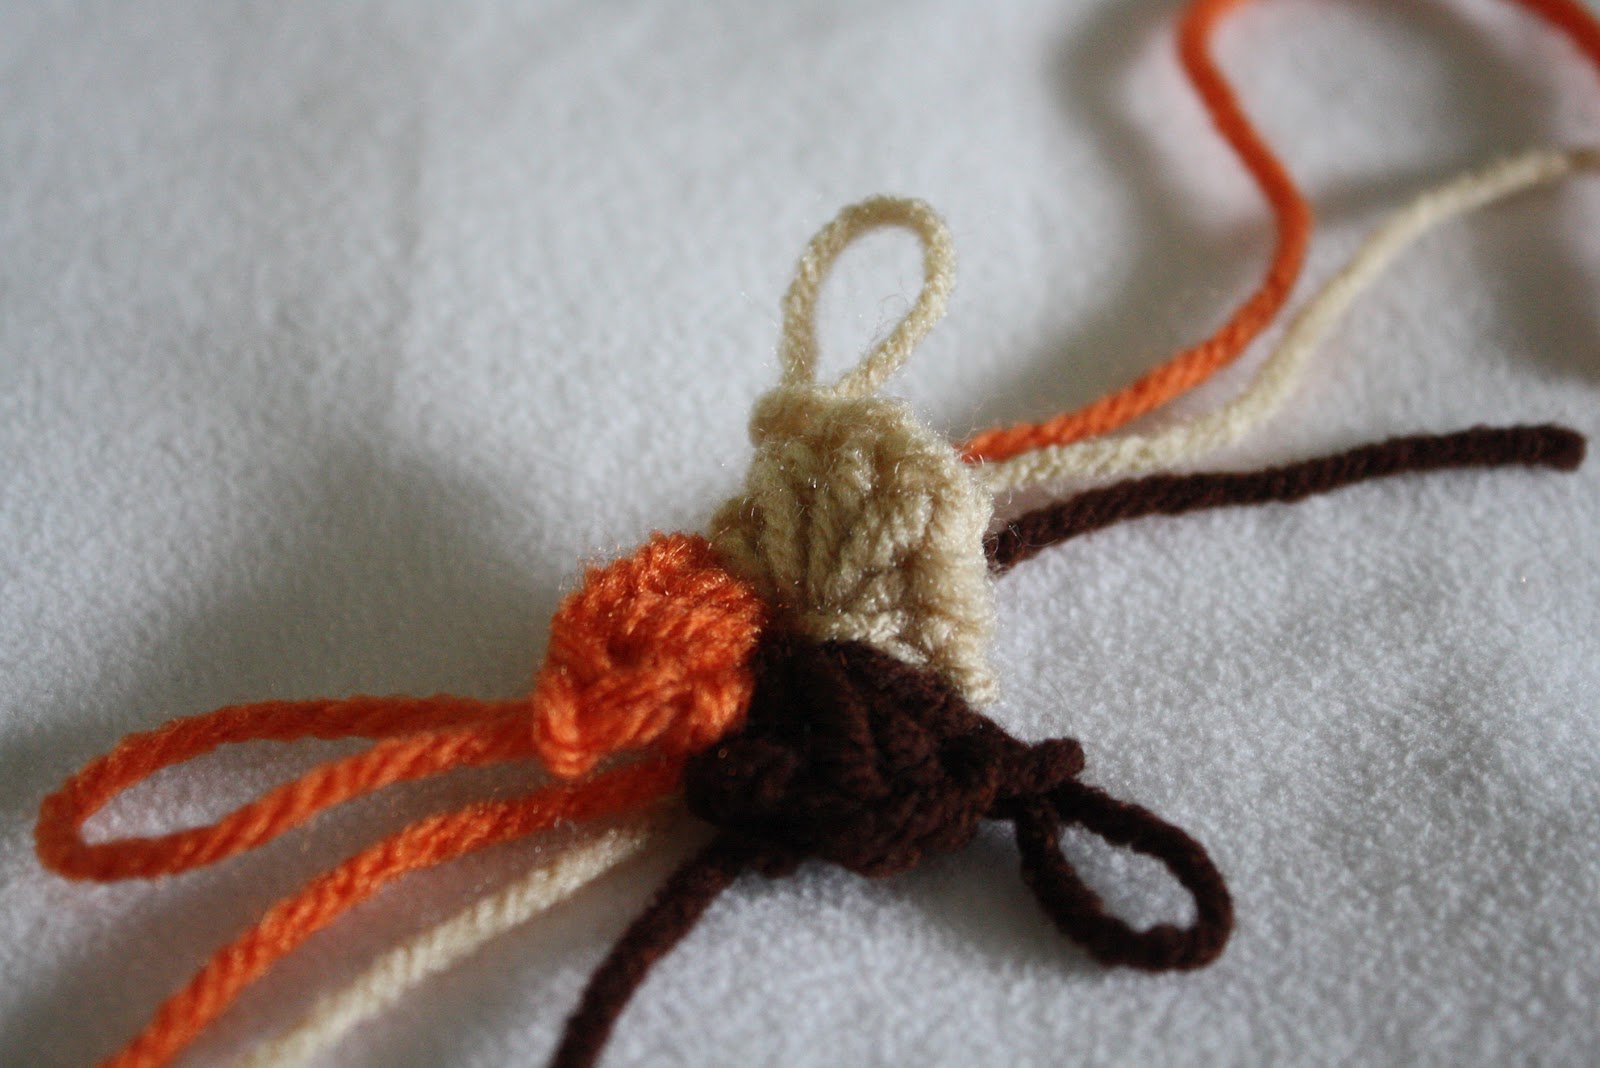
I started by making a 'Magic Ring' (you can find directions on the internet).  I then did one single crochet (sc), and three half double crochet (hdc) in each color. 

 Round 2:
in first hdc - hdc
 in next hdc - 2 hdc
in next hdc - hdc, double crochet (dc)
in next hdc - 2 dc
(in each color)


 Round 3:
*2 dc, dc* in each stitch across (12 total stitches made)
in each color


Round 4:
*2dc, dc, dc*, across (16 stitches)
in each color

Round 5:
*2dc, dc, dc, dc, dc* across (18 stitches)
in each color


Round 6:
*2dc, dc, dc, dc, dc, dc, dc, dc, dc* across (20 stitches)
in each color


Round 7:
dc, hdc, in first stitch, hdc in next 10 stitches
hdc, sc in next stitch, sc in next 10 stitches
in each color

Round 8:
Use color of choice and single crochet around the remaining edges until your color meets itself, crochet small hook (if desired) and tie off.


I am obviously not a pattern writer, so if this is confusing please feel free to comment with any questions!  Enjoy!

Pinterest Project of the Day - Day 8

Today I decided to try to make the 'One Hour Scarf' that I pinned awhile back.  It takes four strands of yarn and a 10mm crochet hook.   I'm not exactly sure if I used the right size crochet hook because my biggest one does not have a size printed on it, but it worked great!  I used four fall-like colors this time, to try the pattern out, but next time I am thinking of using two colors, two strands of each color. I really liked how this turned out.  I do have to admit it took me two days to complete my 'One Hour Scarf' - crazy right?  But, I started it, and worked off and on amidst laundry and housework. Then, left for dinner, planning to come home and finish, but got caught in the storm and didn't make it home until after 11:00, so I finished when I got up this morning.  I do think if I were to sit down and work continuously that I could complete this scarf in an hour or an hour and a half at the most!  I also did not modify this pattern at all!  The pattern can be found at: http://laughingpurplegoldfish.blogspot.com/2008/03/one-hour-scarf.html.  If you try it, let me know how it goes!!

This is my finished scarf and the crochet hood I used.  I got this crochet hook at Wal-Mart for a very decent price!

Monday, July 16, 2012

Pinterest Project of the Day - Day 7

I didn't actually do this project today.  I am actually away from home and am in Memphis at the National Association of Free Will Baptist.  Since it is quite difficult to travel with all my favorite crafting supplies, I thought I would post about a project I have already completed...and actually I have done this project many times. It makes a great gift and every one who has received this has been very grateful! :)  There are many different patterns you can use, either crochet or knit and these are the most useful things you will ever make!!  I have pinned many patterns on my crochet/knit board on Pinterest - the one below I actually found in a book I had bought years ago...the main thing is that you use cotton yarn!   I have found that it is cheapest at Wal-Mart unless you use a 40% coupon at one of the crafting stores like Hobby Lobby or JoAnn!

I am actually talking with a local shop owner about putting some of these in her store on consignment, as well as perhaps some scarves or other hand made items....so, all prayers are appreciated! :)

Also, if you don't want to make your own...check out my shot at http://www.etsy.com/shop/SimplySweetbyCori?ref=si_shop!!  You can even request custom colors.  Enter the coupon code 'Project10' for a 10% discount!


Saturday, July 14, 2012

Pinterest Project of the Day - Day 6

Since I got married almost two years ago, I now live about an hour away from my parents.  So, in an effort to see them on a more regular basis during the summer (since the school year is crazy for us all) my Mom and I have been scrapbooking each Tuesday through the summer.  We would be at her house for a few weeks, and then at my house for a few weeks.  It has been wonderful!  I have completed the 2010 scrapbook (I had skipped 2008 and 2009 to get to the wedding year) except for the wedding (I can't find an album I like...), and I am halfway through 2008.  I hope to be finished with 2008 and 2009 by Christmas, so I will only be about two years behind in January 2013!  I love to look at other people's ideas for scrapbooking and I love to find ways to use one or two items to do the work of a lot more.  Today's project was to make flowers out of punches I already had in my scrapbook tote. My project was to use my large oval punch and some scrap paper to make a flower, I punched 5 ovals and used one of those little flowers and mini brads for the center!  I was very excited about how it turned out!!


Friday, July 13, 2012

Pinterest Project of the Day - Day 5

I decided to do one of the crochet projects today.  On Tuesday my Mom and I went to Cross Plains to have lunch at Thomas Drugs, a pharmacy and soda shop. While we were there we checked out a couple of the local shops.  I spoke with one of the shop owners about selling some items on consignment and we discussed my hand crocheted dish rags and scarves.  So, I have been looking at different types of scarves that are comfortable, cozy, not overly difficult to make, and attractive.  I got the basic idea for today's scarf from a pin on Pinterest (http://brookeanndove.blogspot.com/p/about-me.html).  However, it called for a thick yarn, which I don't keep on hand.  However, the next time it is on sale at Hobby Lobby (or I have a 40% coupon) I plan to get a skein of the thick yarn to try it out also!  So, of course, I modified the pattern given on the website to make the scarf work with the yarn that I did have on hand.  I do not own, and I have never made one of the infinity scarves...so, that is what I made today! 

(please excuse the shirt that does not match the scarf...)


My modified version:

Red Heart yarn (I only used less than half a skein to make this)
Crochet Hook I/9 - 5.5mm
     * Chain 150
     * Connect to beginning chain with a slip stitch, chain two (this will count as your first double crochet - on this row and each row throughout)
     * Double crochet in each chain, connect to ch 2 with a slip stitch.
     * Repeat double crochet until scarf is desired width.
         (this picture is with 7 rows of Double Crochet....I plan to go back and add at least one row)

Good Luck! Let me know how your projects turn out!! :)


Thursday, July 12, 2012

Pinterest Project of the Day - Day4

Today's Pinterest Project of the Day is not actually from Pinterest....However, I believe it will be on Pinterest soon.  I have to give full credit for this idea to my Dad.  I have always had difficulty storing my purses...I tried drawers, shelves, and everything I could think of, but nothing would work.  So, when I bought my first house a few years ago, my Dad had a brilliant idea!  My closet was a walk-in, with two walls of shelving and one empty wall.  He had the amazing idea of hanging a piece of pegboard on the empty wall and using that to hang my purses and tote bags.  It was the most amazing closet revelation ever!!!  So, today, my wonderful sweet loving husband and my brilliant father cut a piece of pegboard and hung it in my closet!!  I just hope the people that bought my first house understood why there was pegboard in the closet of the master bedroom of a single girl... :)   I used various sized pegs (from Lowe's) to hang the purses, and I also bought a couple baskets (that fit in the pegboard) to hold things like sunglasses.  I also use one peg to hang belts from!


If you have any amazing closet organization ideas please let me know!!

Wednesday, July 11, 2012

Pinterest Project of the Day - Day 3

Hi, my name is Cori, and I am addicted to dessert... 

My Grandfather is talked about for asking what was for dessert as soon as the prayer for the meal was over!  I think I am much like him in that way.  I am always ready for dessert.  As a child, I would tell my mother that I was full of regular food, but that I had a separate space for dessert!  Being in and out of town or visiting with family during the summer means that I don't do as much cooking.  The only desserts I have made in the past few weeks have been to take places.  Tonight after dinner, I wanted some dessert, but I did not want to make a big dessert.  I recalled seeing the Mug Cake on Pinterest.  So, as usual, I compared a few different recipes that I found, and modified them to make my own version.  It was delicious!  This project was definitely a success.  I may still tweak the recipe some...next time I plan to try using one egg in two mug cakes (I made two tonight,because if you make dessert, you should have enough to share with your loving husband!).  I will let you know how it goes in the future.  Below is the recipe I compiled and modified to make my own.  If you have any recommendations, please comment! I would love to hear your feedback!


Mug Cake

4 T All Purpose Flour
4 T Sugar
1/2 tsp Baking Powder
1 Egg
1 T Coco Powder
1 1/2 T Hershey's Syrup
1 T Milk
1/2 tsp Vanilla
3 1/2 T oil
Chocolate Chips

Mix all ingredients in large coffee mug.  Cook in microwave for 1 to 1 1/2 minutes.  Let cool - just enough that it won't burn you.  ENJOY!!!

Monday, July 9, 2012

Pinterest Project of the Day - Day 2

I am all about doing things that can save money!  I also love to do things 'home-made'.  I don't go as far as some do, but I do try to do as much as I can to make my own products and do it the cheap way! I also have always been a huge fan of dishwashers!!  As I would help my Mom with dishes at home I always told her that when I got my own house I only wanted 'dishwasher safe' items.  While, not every item in my kitchen now is dishwasher safe, the majority of my items are! Because I love to cook, and try to make everything I can from scratch, I generally mess up quite a few dishes when I go to cook dinner. Therefore, I run my dishwasher every couple days at least (and I'm sure that will increase as we have children!).  Dishwasher tabs are quite expensive and that expense was just not fitting into my weekly Wal-Mart grocery and household needs budget.  So, a friend of mine had tried making dishwasher detergent from a recipe found on Pinterest and they truly liked it!  Well, I got on Pinterest and found quite a few recipes for dishwasher detergent.  Some made huge batches, some made small batches, some required lemon Kool-Aid (which would stain your dishwasher after a few uses).  After ready many many recipes, I finally found one I wanted to try!  So, I mixed up a batch and of course, just happened to have a dishwasher full of dirty dishes to try it on!  I have to say, I like it!!    Below is a picture of my detergent and the recipe I used to make it!  I also used vinegar as the rinsing agent (in that little spot in the dishwasher door!).  Good Luck and enjoy!!


2 cups of Borax
2 cups of Baking Soda
 4 tablespoons of citric acid--can be found near canning items
White Vinegar

Mix everything together by either dumping into a big bowl and stirring it really well or dumping it into a container with a lid and shaking it up. You can keep it in your lidded container or re-use your old detergent box, or a jar.

I use about 1 1/2 tablespoons per load. (3/4 tablespoon in the open cup and 3/4 in the closed locking cup)  I have heard that if you have hard water, you can adjust the amount of Borax, or add salt to the detergent mixture

Saturday, July 7, 2012

Pinterest Project of the Day - Day 1

I have pinned so many amazing and interesting things on Pinterest, but have not followed through on doing many of them.  Therefore, I am going to try to go through and do as many as possible!!  I thought it would be fun to post about how each project went as I did them.  Today, I made my first diaper cake.  I have seen many diaper cakes as various showers and such, but I have not ever made one.  I wanted mine to be a little different.   I had noticed at showers there was always a cake and a diaper cake.  So, I thought I would try to combine the two.  (I also thought it might be a cute marketing idea for Simply Sweet ~ by Cori www.simplysweetbycori.blogspot.com)  I checked out pinterest for some diaper cake ideas and there were so many cute ones!  Since this was my first I didn't do anything to terribly elaborate.  I simply made a large round cake and then made two layers of diapers for the topper.  I did not plan ahead very well and had to ask my husband to help me.  I really needed more rubber bands than I had on hand.  I needed to rubber band the center, then wrap the diapers around it and rubber band that...but my husband had to hold diapers in place until I could rubber band them! The cake turned out very well!  Hopefully now that I have the basics down I can make one a little more fun/fancy next time!